Olympic medals aren’t just meant for renowned athletes. Not at all. Ourselves and the people around us have all fought and won different battles in life, and such triumphs, big or small, leave us deserving of some pat on the back.
And thankfully, you don’t have to spend a fortune buying lavish medals made of expensive metals. With some commonly available household items coupled with a little creativity, you can create custom Olympic medals that perfectly spell out your style.
In this article, we will examine some of the DIY techniques you can use to develop your own Olympic medals. You’ll notice that our procedures are very straightforward, so you don’t need to be a seasoned medallist to do a fantastic job.
3 Simple Ways To Make Your Own Olympic Medals
I won’t lie. When I first heard that making my own Olympic medals was possible, I thought it was an intimidating task.
What came into my mind was I’d need to get some precious metals, melt them with special equipment, do the casting, and all that sort of work.
But as I learned later, that’s not the case. In fact, as you’re also about to discover, medal-making is one of the simplest DIY projects you’ll ever do in your home.
Leave alone using expensive metals, you may not even have to work with any metal in the first place, but that will depend on the technique you choose.
Enough of story-telling and now into the nitty-gritty of our topic. Below are three simple-yet-effective ways of making Olympic medals.
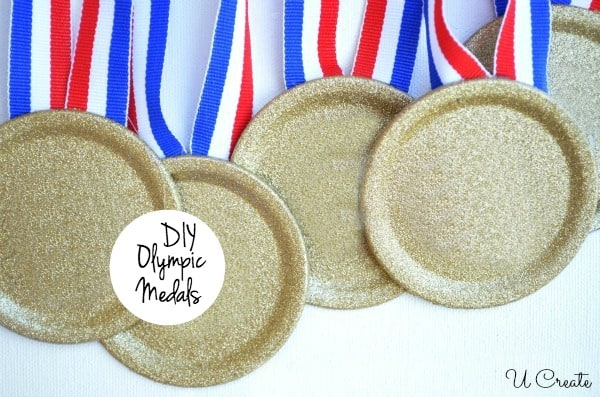
Method 1: Using Canning Lids
We’ve all bought products that came in jars sealed with metallic canning lids. It could be honey, sauces, fruits and vegetables, jam, and so on and so forth.
But have you ever figured out that you could use that lid for a totally different task outside of sealing the contents of the jar?
That’s true, and one such area is making your custom Olympic medals.
But of course, it’s not the only thing you need for the job.
Here’s the list of the items necessary in its entirety;
- Canning lids
- Golden-glow glitter blast spray paint
- Ribbons (one for each canning lid)
- Glue gun with glue sticks
- An old newspaper (any other material you won’t need to use after will do).
If you don’t have any canning lids, you can easily get them online. This Evahab pack worked exceptionally well for my needs, but you can rely on this fantastic pack of 10 if you intend to make only a few medals.
Once you have all the ideal paraphernalia, the rest is easy.
Procedure:
1. Prepare your work area
Before anything else, prepare your space for the work. Find a flat surface and spread the newspaper – or any other material you intend to use for the project – on it.
2. Paint the canning lid(s)
Coat the lid(s) with the spray. As usual, ensure the surface is dry and clean for the paint to work perfectly.
Also, remember to shake the paint more vigorously than you would regular spray paint before using it. This will ensure that all the glitter is spread throughout the paint for more uniform results.
Once done, you can now apply the first coat using a moving motion. Then, leave it to dry before applying the second layer. The drying time for this type of paint will be longer than for normal paint, but the results are well worth the patience.
3. Cut the ribbon
You can cut the ribbons as the canning lids dry out. The length will depend on your preferred size, but I recommend working with 20 to 25 inches. This size offers enough room to go through your head without being overly long when hanging on your neck.
4. Fix the ribbon
Take this step once the canning lids have dried out completely. Here, you’ll need to use the glue gun and the sticks to hot glue the ribbons to the back of the painting canning lids. Leave the glue to dry – and that’s it!
DIY Olympic Gold Medals from U Create
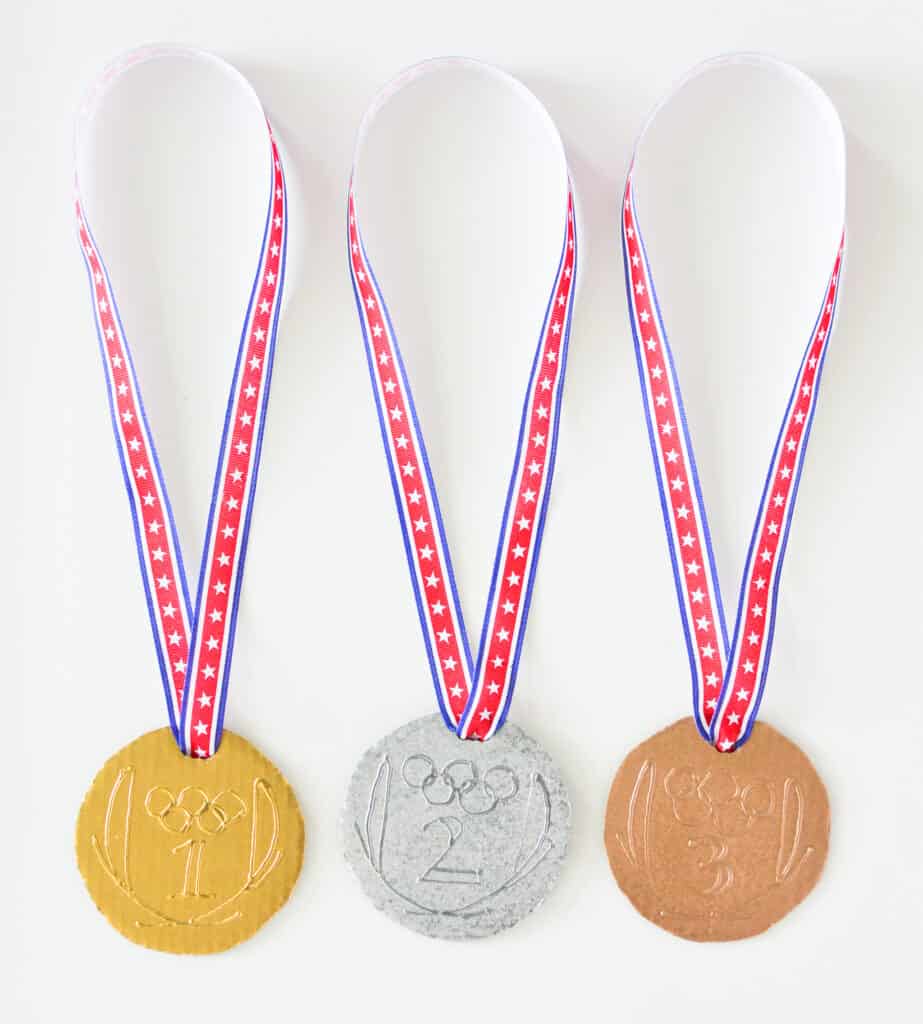
Method 2: Using Cardboard
The second technique of making your DIY Olympic medals doesn’t require you to use anything metallic. Instead, you’ll only need to work with cardboard and a few other essentials.
Here’s what you need:
- A cardboard
- A pencil
- An empty glass
- Scissors
- Puffy paint
- Ribbons
- Metallic spray paint
- Hole punch
- Glue gun and sticks
Most of these materials – if not all – are more likely already in your home. For those lacking, you can always grab them online for an affordable price.
Procedure:
- Do the tracing: Place your cardboard on a flat surface. Then, using a pencil, draw your circles by tracing your glass on the cardboard. You’ll need as many circles as the number of medals you intend to make.
- Cut out the circles: Use a pair of scissors to cut the circles from the cardboard. Ensure you do it gently and carefully to avoid cutting into the circles.
- Pour out your creativity: Once you have the circles cut, pick a pencil and draw your designs onto the circles. Do a light tracing in this case. You can make similar designs or a variety of them, depending on your preference.
- Time for puffy paint: Apply puffy paint on the circles following the light drawings made using this paint. If possible, stick to puffy white paint, as it’s more favorable for the project than any other. Let it dry completely before moving to the next step.
- Paint: It’s now time to apply your metallic paint. Spray the first coat of paint and leave it to dry before applying the second one. You will need at least two coats of paint for the best outcome, allowing adequate time in between the coats and after the final layer for drying.
- Do the punching: Use a hole punch to make clean holes on each of the painted circular cardboards. Keep it at the top so you can have the medal hanging perfectly. You can use a pair of scissors or an X-Acto knife like this one if you don’t have the punching equipment.
- Attach the ribbons: Cut ribbons about 20 to 25 inches long and overlap the ends before threading them through the front of the hole you just made. Then, using hot or Elmer’s glue, glue the ends down and leave to dry – and that’s it!
DIY Olympic Medals for Kids from Project Nursery
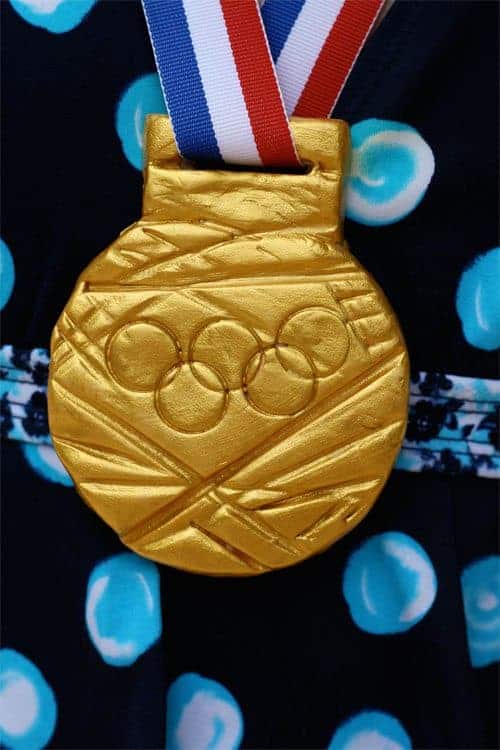
Method 3: Using Polymer Clay
If you’re an enthusiastic DIYer, chances are you’ve already used polymer clay in several of your DIY projects. This clay is a very versatile material that allows you to make almost anything from it.
But are you aware that it could make a perfect material for homemade Olympic medals?
That’s right.
In fact, using this type of clay is a super-fun way to make Olympic medals for the young champs in your home, and they’ll even be happy to help.
But get these essentials first:
- Polymer clay
- Metallic paint
- Ribbons
- Sculpting tools
- An empty glass
- Paintbrush
- Writing paper
- Pencil
As you can see, you don’t need much here. You can get polymer clay from most stores or even online if that works better for you.
Procedure:
1. Draw your design
On the piece of paper, use a pencil to sketch out how you want your medals to look like when completed. This will serve as a guide when developing your Olympic medals.
Ensure to incorporate all the Olympic designs and motifs you may want to incorporate in your project.
2. Knead and cut the clay
Knead your polymer clay until it becomes soft and pliable. Then, using a glass, press it into the clay to cut a circular piece. Cut as many pieces as the intended number of medals.
Keep the clay about 1/4 to 1/2 inch thick, depending on your preference and the nature of your detailing. I recommend leaning on the thicker end of the spectrum if you intend to make more intricate detailing.
3. Create your design
At this stage, you want to incorporate the designs you highlighted in Step 1.
Create all the raised and engraved designs using sculpting tools. Precision here is necessary, so be careful when doing the designs.
As you draw the designs, ensure that you also make a smooth and evenly-cut hole for the thread or ribbon. It’s easier at this stage than after you’ve baked the clay.
4. Time for the oven
Once everything about the design is set, it’s not time to do the baking. Follow the instructions on the clay packaging for the ideal heat setting and baking duration.
Usually, the recommended temperature is around 275°F (135°C), while the typical baking duration is between 15 to 30 minutes, but lean more on what the manufacturer says.
Once time is up and the clay is baked, remove it from the oven and let it cool completely.
5. Attach the ribbons:
Lastly, insert your ribbon into the hole of your medal and knot it at the back of the medal. You can use a thread if you don’t have a ribbon, and it will work just perfectly.
And there you have it – your DIY Olympic medals!
DIY Olympic Gold Medals from Alpha Mom
I hope this article was helpful.
Please let me know in the comment section below what method you plan to try out. Also, feel free to share any other DIY medal-making technique you know.